Hello! This document will walk you through the entire process of setting up a development environment for the IT1020 OOP Project. I will break this into 2 parts.
Setting up GitHub environment.
Setting up Intellij Project Environment.
Before we begin.
The OOP Project is created using Java, JSP and Java Servlets. To setup a proper environment for this project, there are few things you have to have in your machine.
This step is for your group’s leader / “Project Manager”. Or whoever is setting up the project.
Setting up JetBrains Intellij
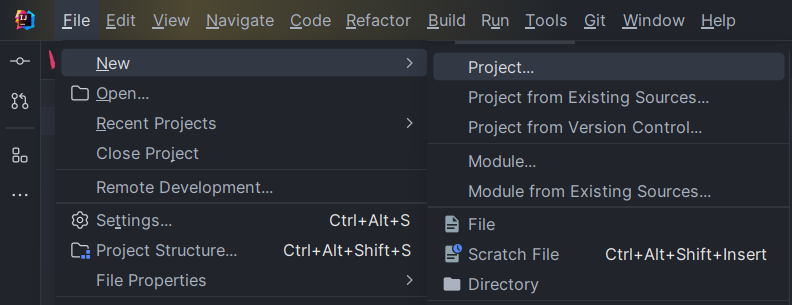
First step. Go to Intellij > New Project > Jakarta EE
Step 1
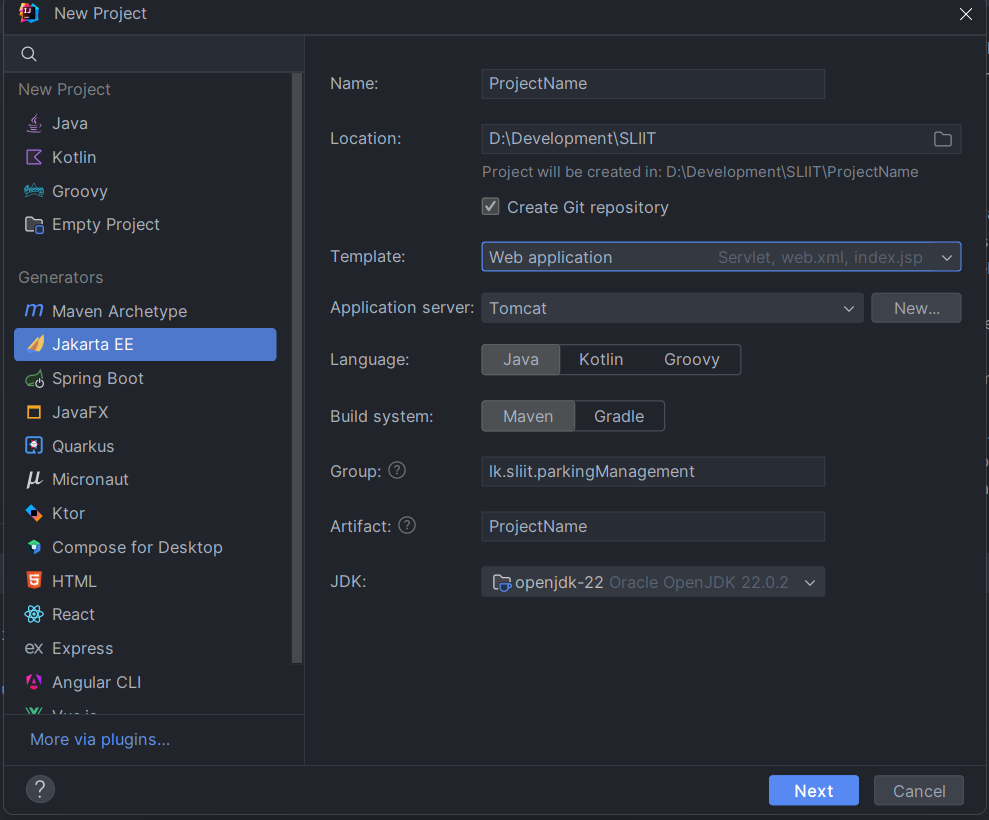
Step 2
What you need to make sure and what to put in
Name: This is your project name (This can be anything but use camel case, because this is also your artifact)
Location: You know this one.
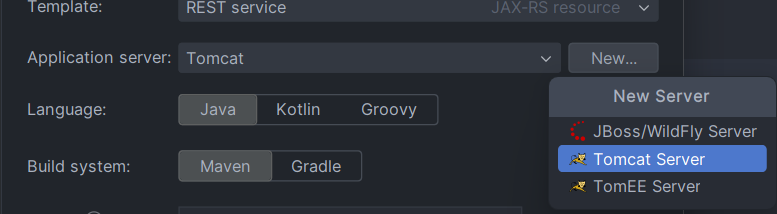
Template: Make sure you have selected web application
Application Server: Tomcat. (how to set this up is in next section)
Language: Java
Build System: Maven
Group: It should be named as lk.sliit.<projectName>
Artifact: Don’t change anything
JDK: Don’t change anything
Danger
Make sure you have checked: Create Git Repository.
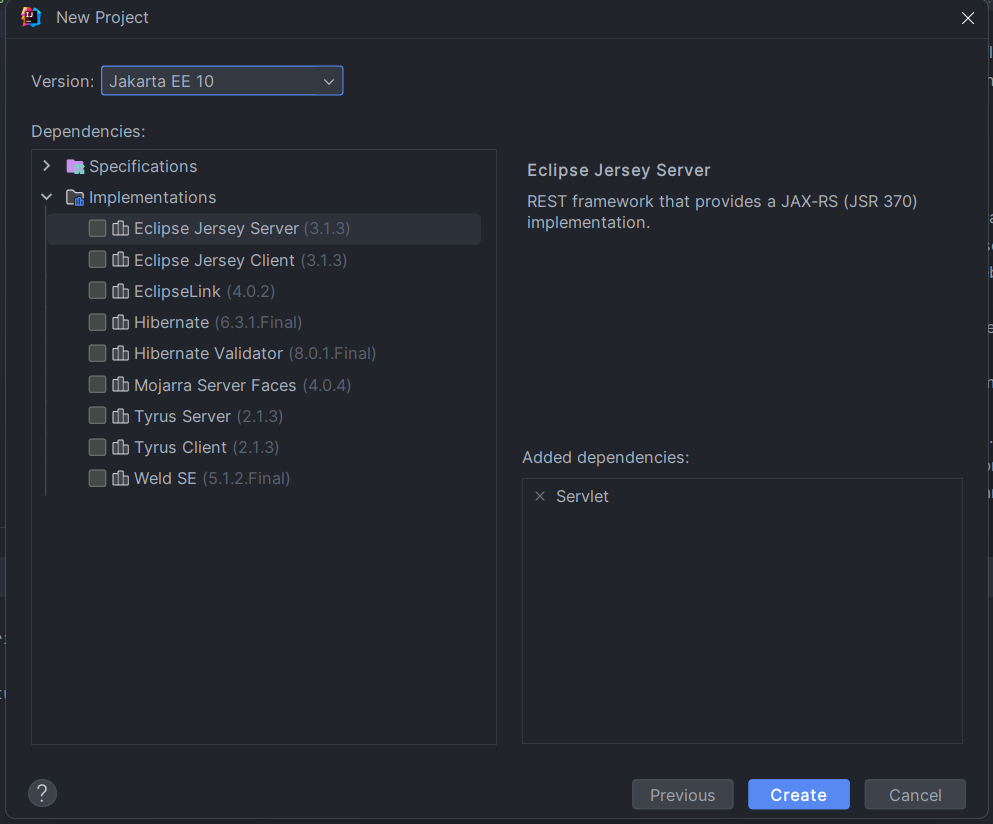
Step 3
On step 3 make sure you have selected Servlet it should be listed under Added dependencies. If you don’t see it, go to Specifications > Servlet. Then as final step create your project.
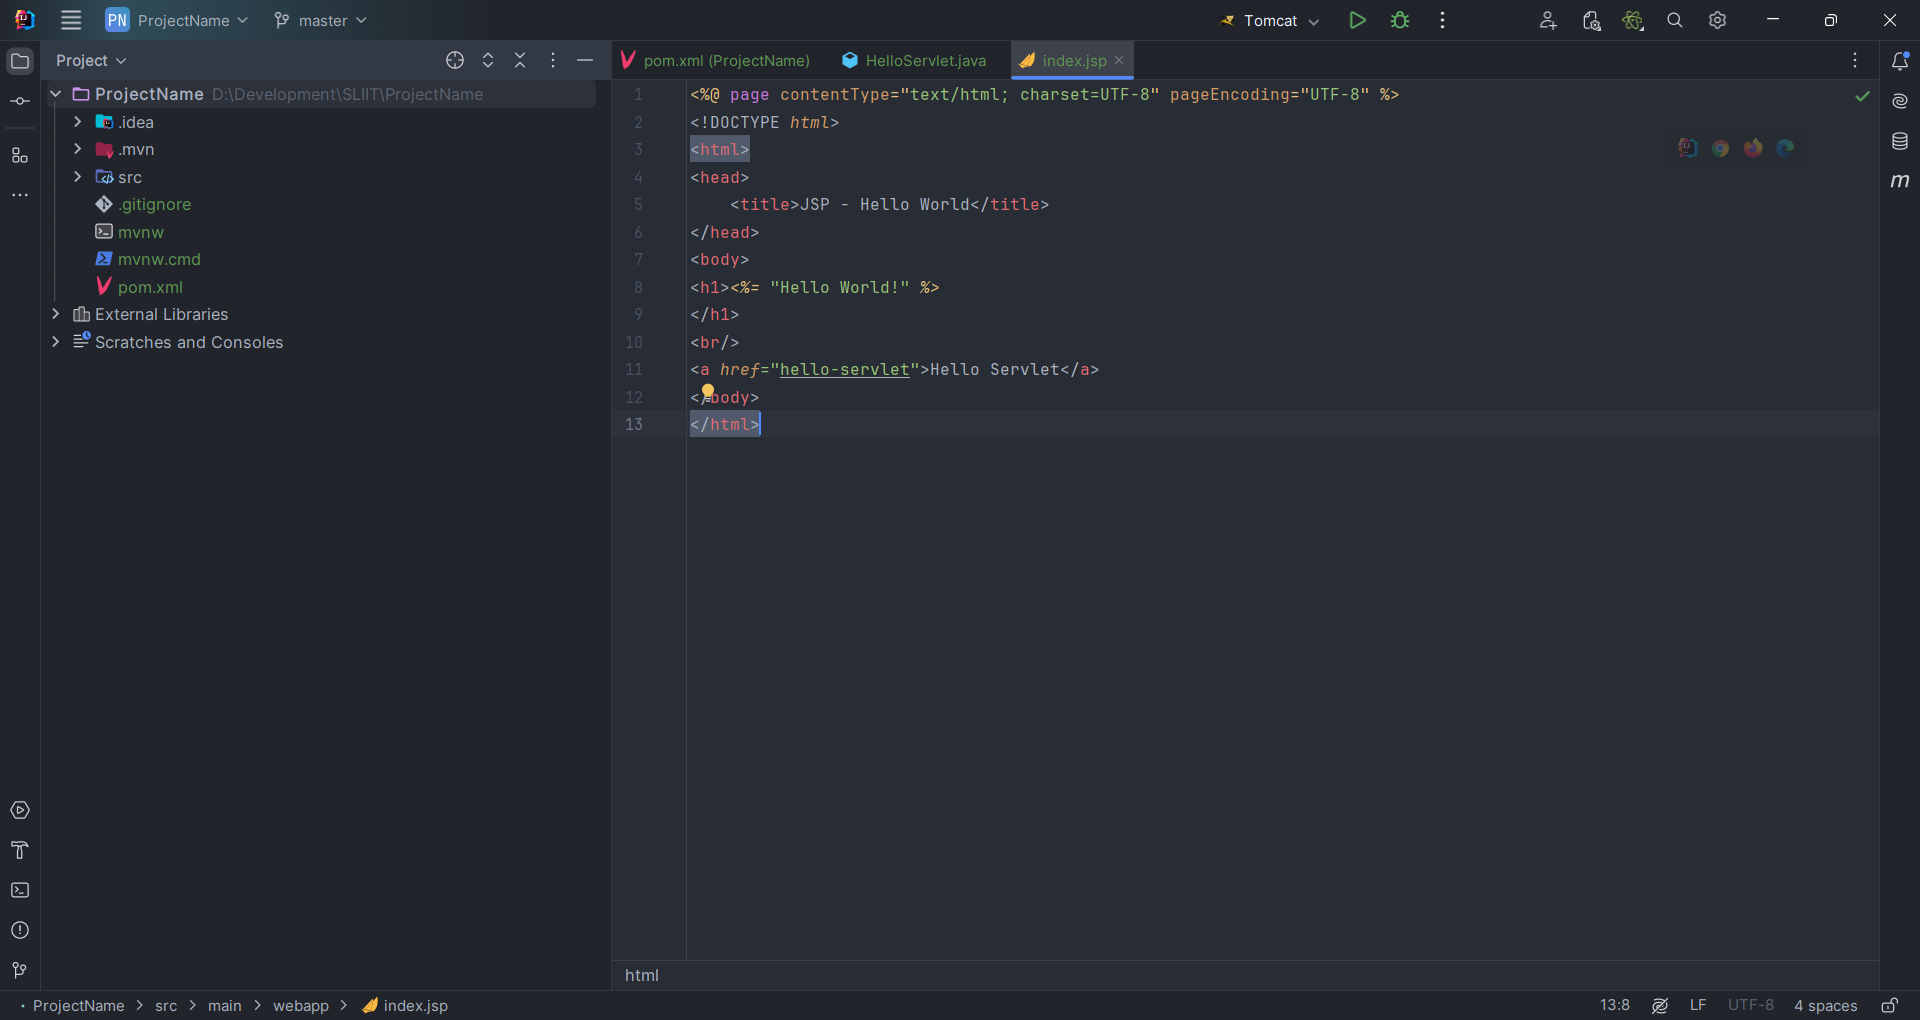
Your project should look to something similar like this:
Setting up Apache Tomcat Server
When you’re creating the project. If this is you’r first time, the application server should show No application. So click New > Tomcat server
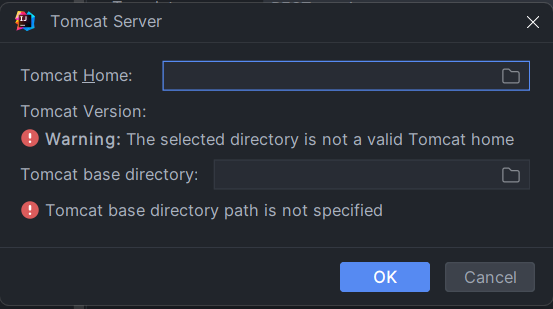
from there locate to where you installed Tomcat.
Alright, once you set those things properly. Open the project, you will have a simple boiler plate that you can play around with. We can run this website with Tomcat. So lets run this.
For that simply go to the top right of your screen and see if Tomcat is selected.
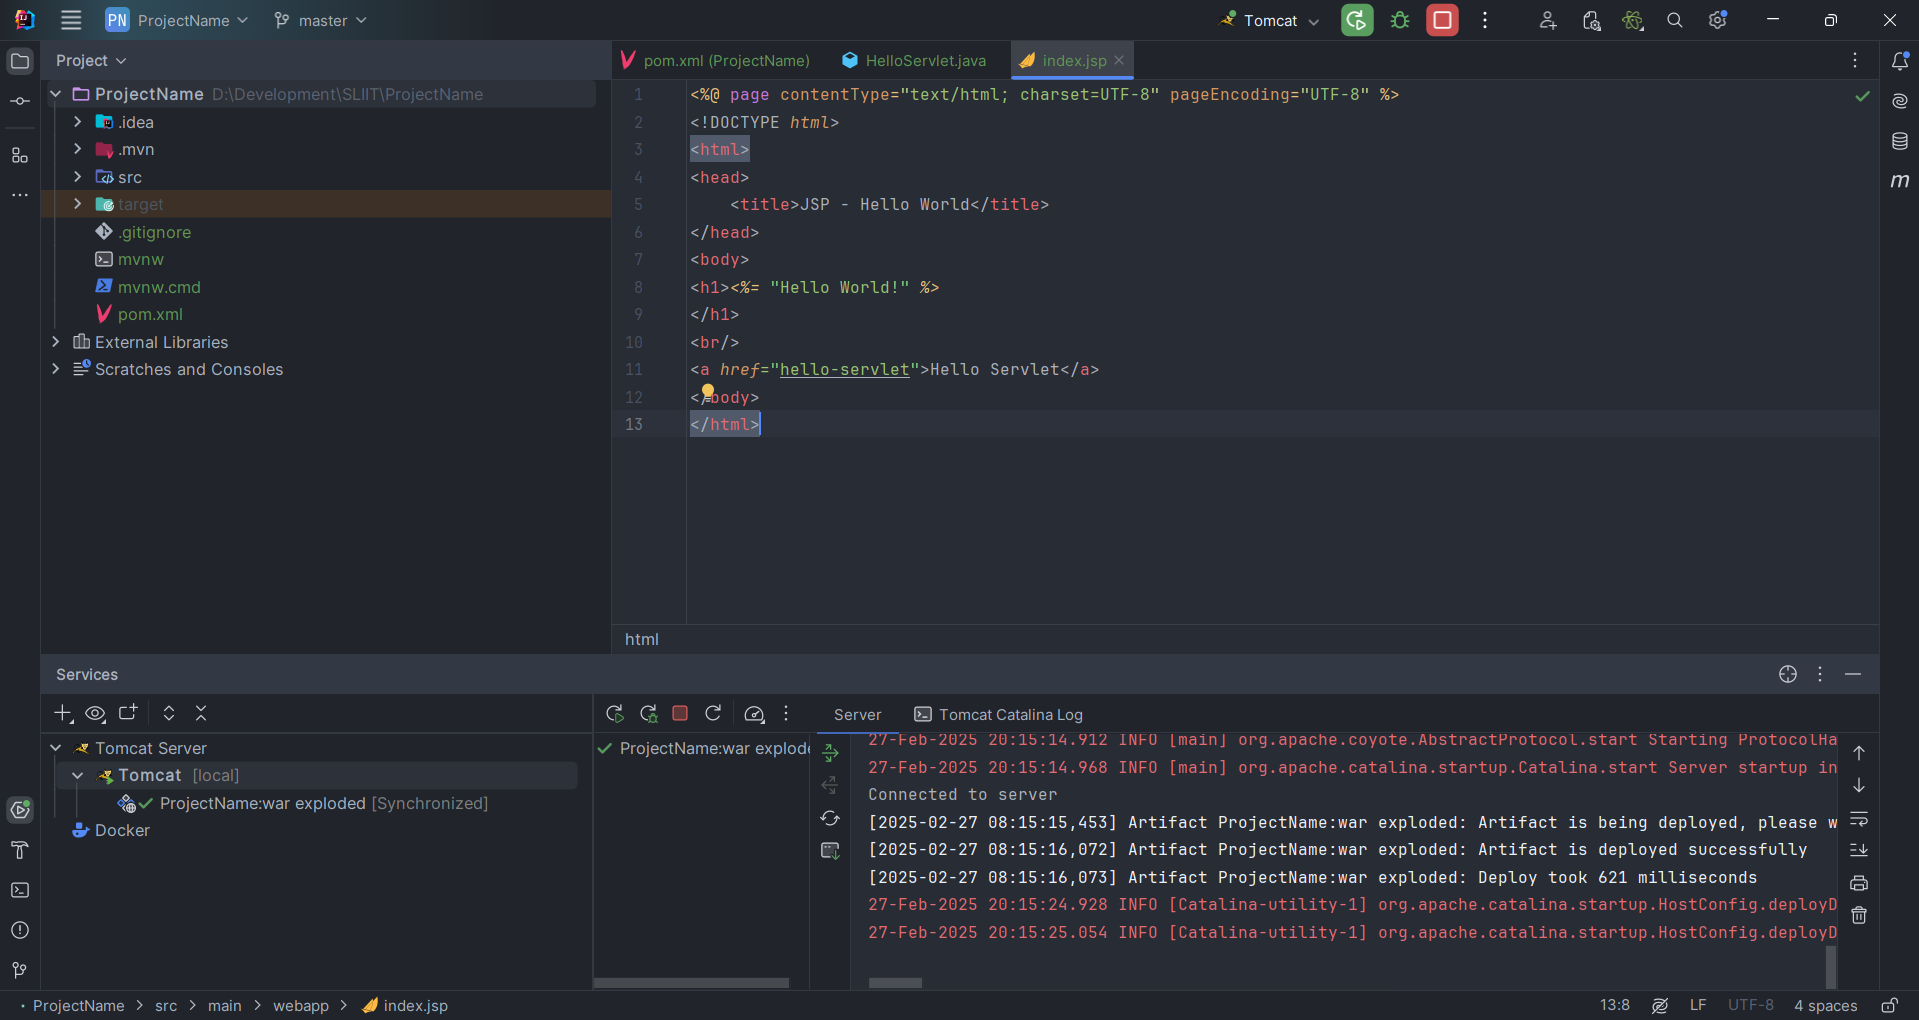
if it is, simply click on the green play button. if Not. Go back and do steps above. Once you started the server, it should show some stuff like this.
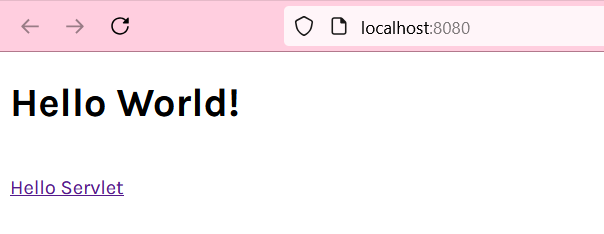
If it worked it should automatically launch your default web browser with the website. Otherwise, go to http://localhost:8080/ProjectName_war_exploded/.
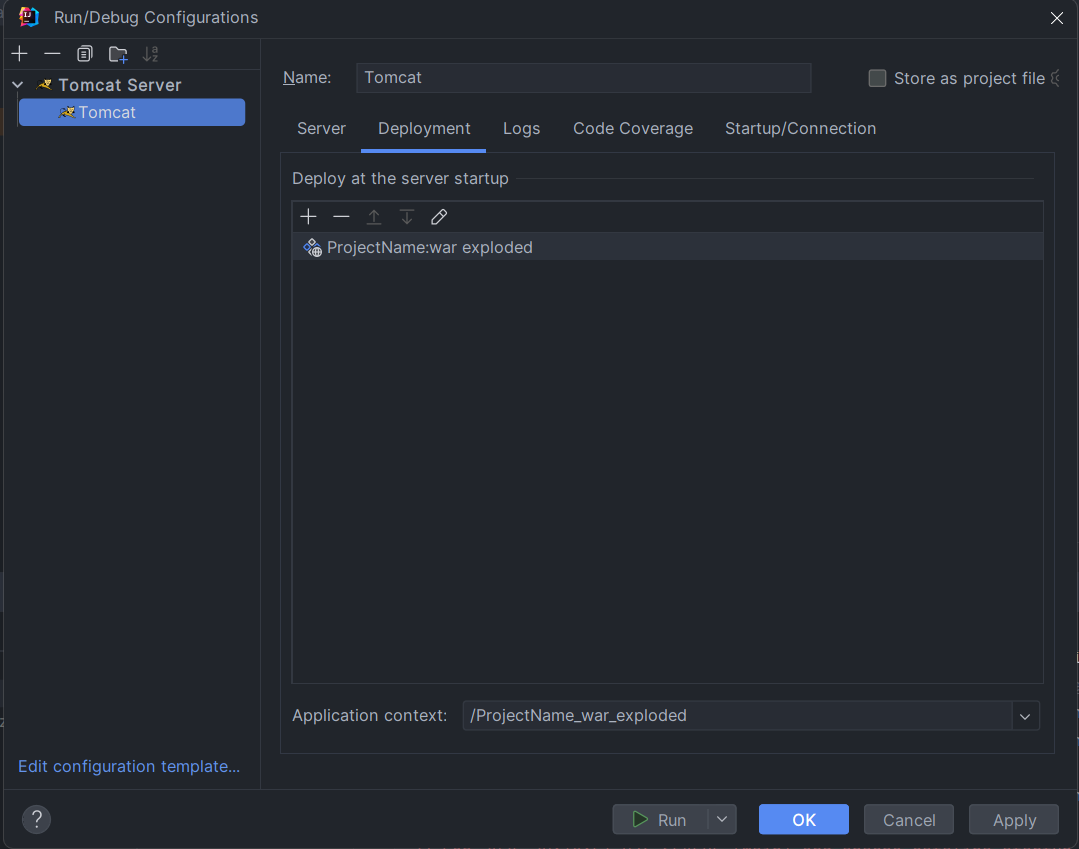
Now the part where it says /ProjectName_war_exploded/ isn’t very pleasing to go to right? To fix this, stop the server by clicking the red stop button and click on Tomcat again. And then go to Configuration.
In there go to Deployment: It should look like this
Simply replace the Application context to /. Then hit apply and then OK. Now the next time you launch the server it should simply be http://localhost:8080/.
Setting up GitHub Project Management.
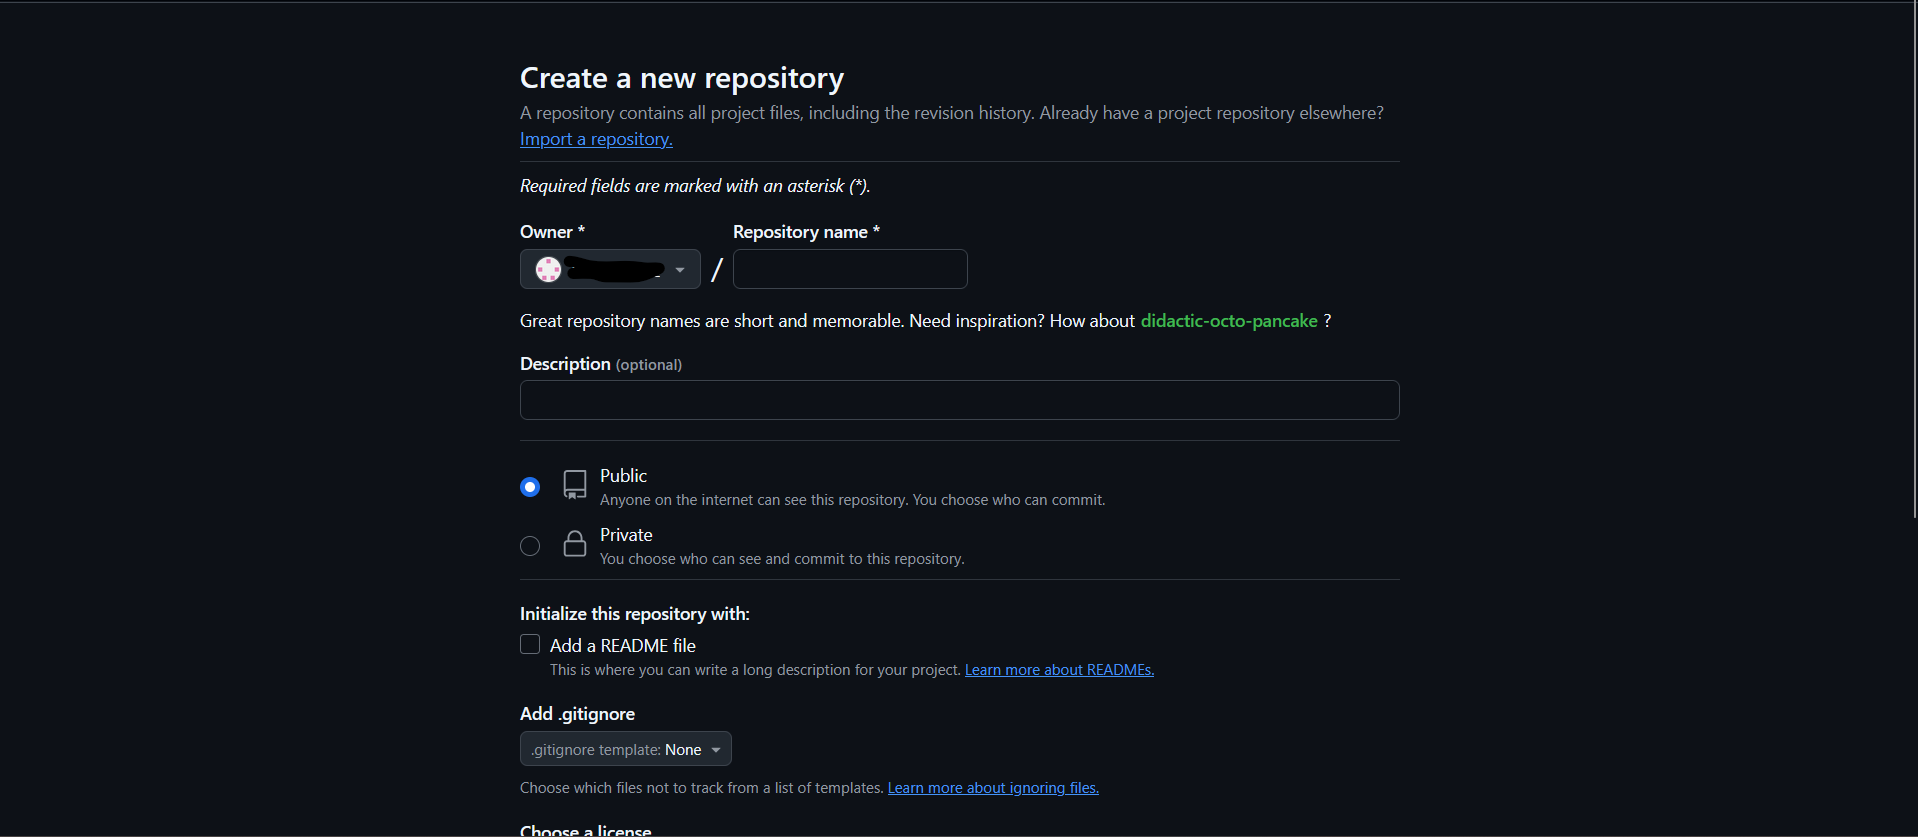
Go to your github account: New Repository or simply type github.new in your address bar.
Make sure you only add the name of your repository. This can be anything but keep in mind as an industry standard to not use Capital letters, spaces. Use camel case or Underscores.
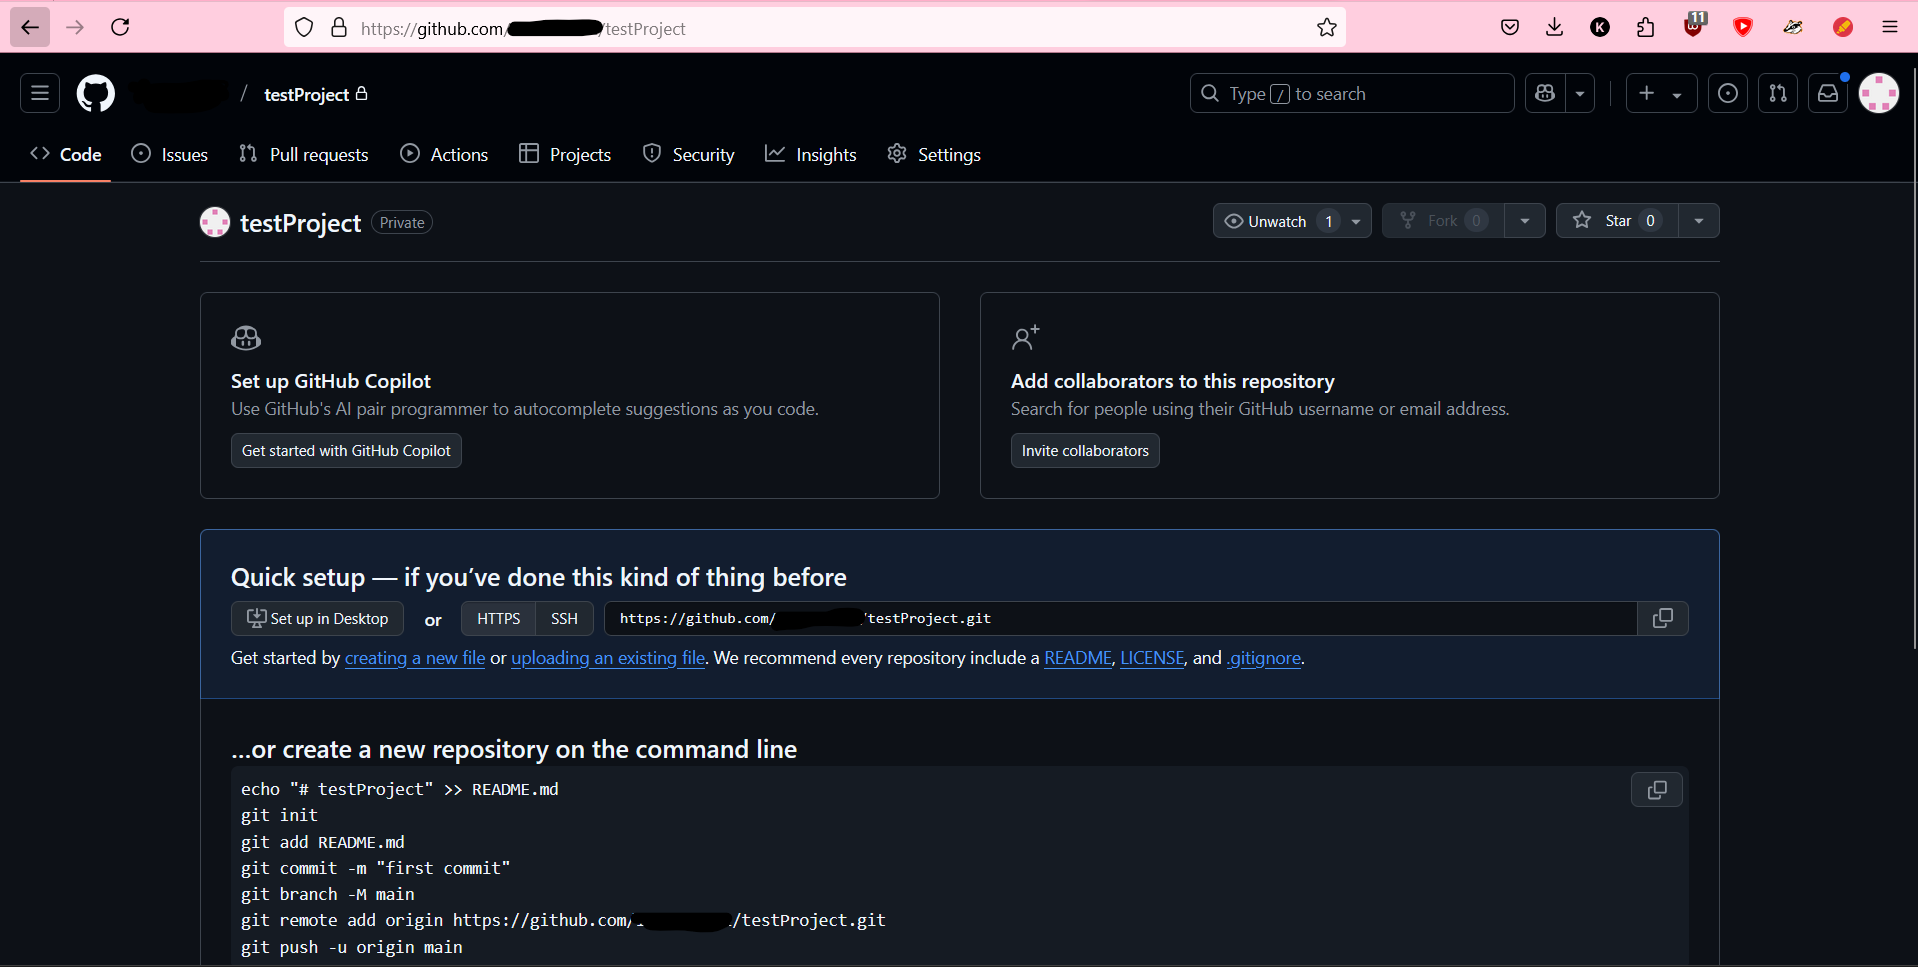
Make sure your repository is private and then create the repository.
Danger
You Must Not add a readme, description, .gitignore, or a liscence.
Why? Because we will be pushing a local repository to a remote and if there are any files on the remote that is not in the local, there will be conflicts.
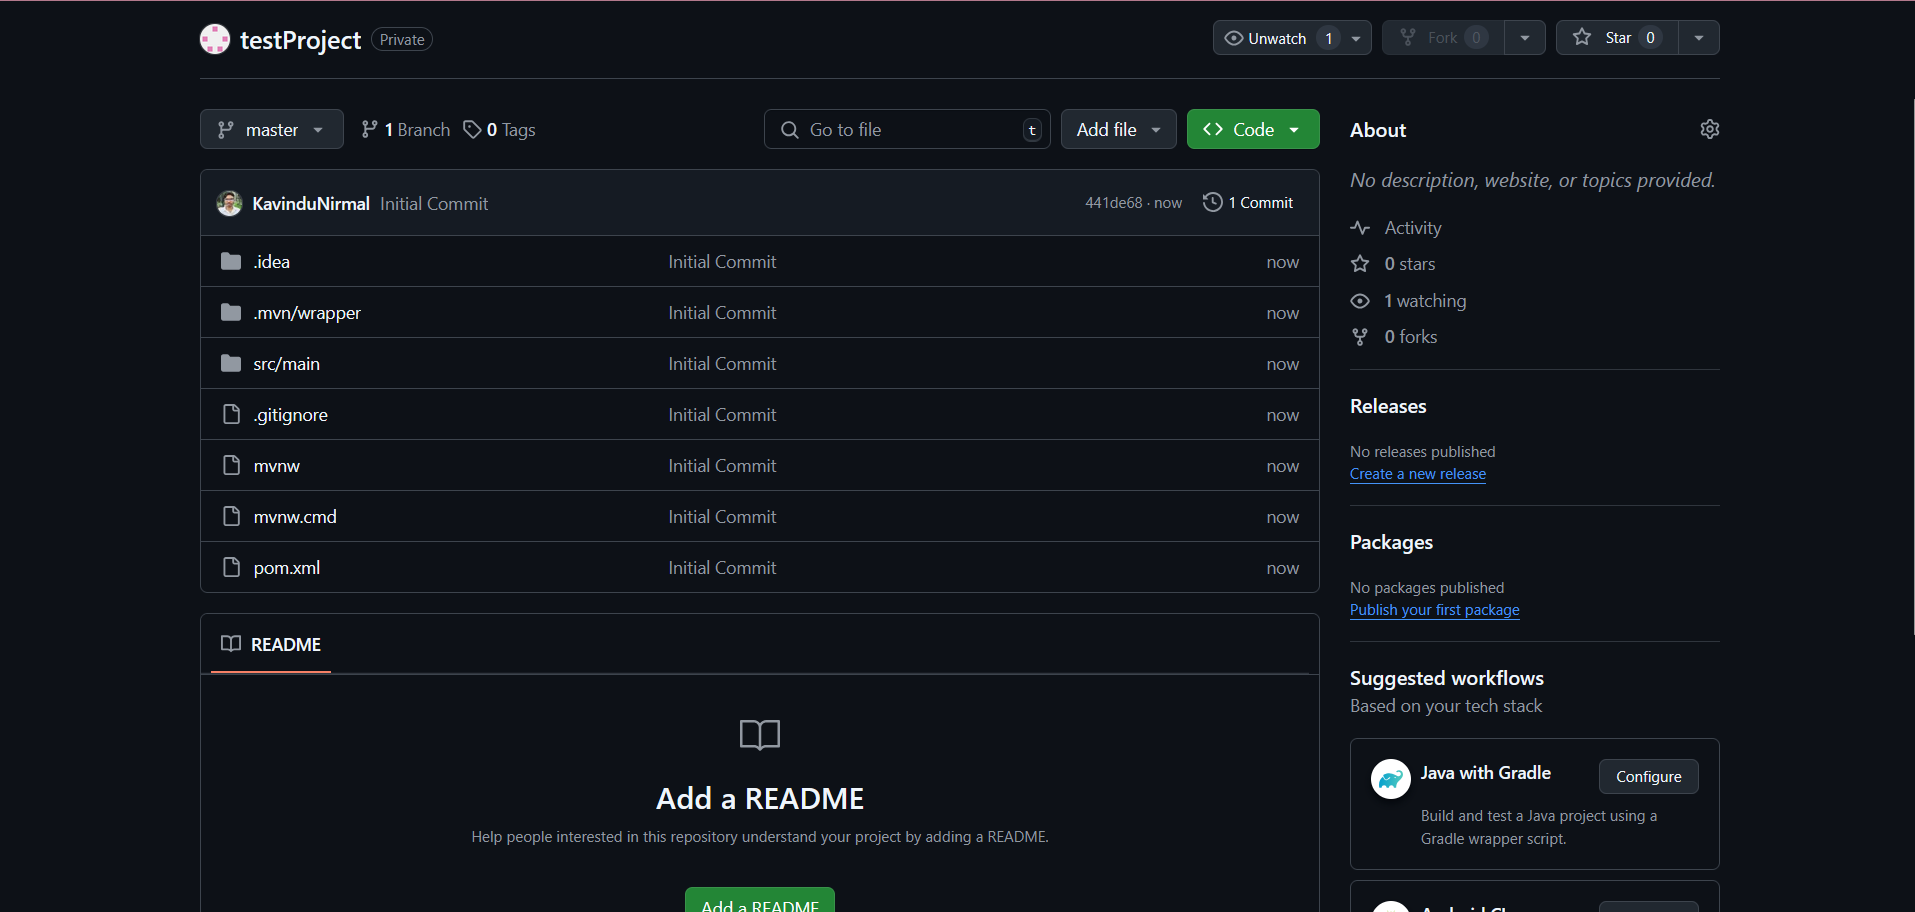
If you did everything correctly you’d be shown to something similar like this:
If you have come this far: From now on, Pay attention.
Setting up working branches, automating branches and development.
Let’s go back to the IntelliJ. If you look at the directory index, you’d see they are colour-coded now.
(The file names, not the icons.)
Git Colours
Green: Tracked & is new
Blue: Modified
Red: Deleted
Gray: Untracked
Now if you go to the commits tab in intellij:
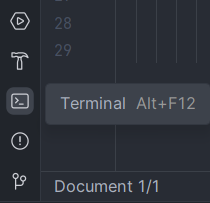
You can see all the changes you made to the files. Since this is the project initialization. All the files are green and ready to be committed. But before we do anything here open the terminal (bottom left) and type:
git config --local --list
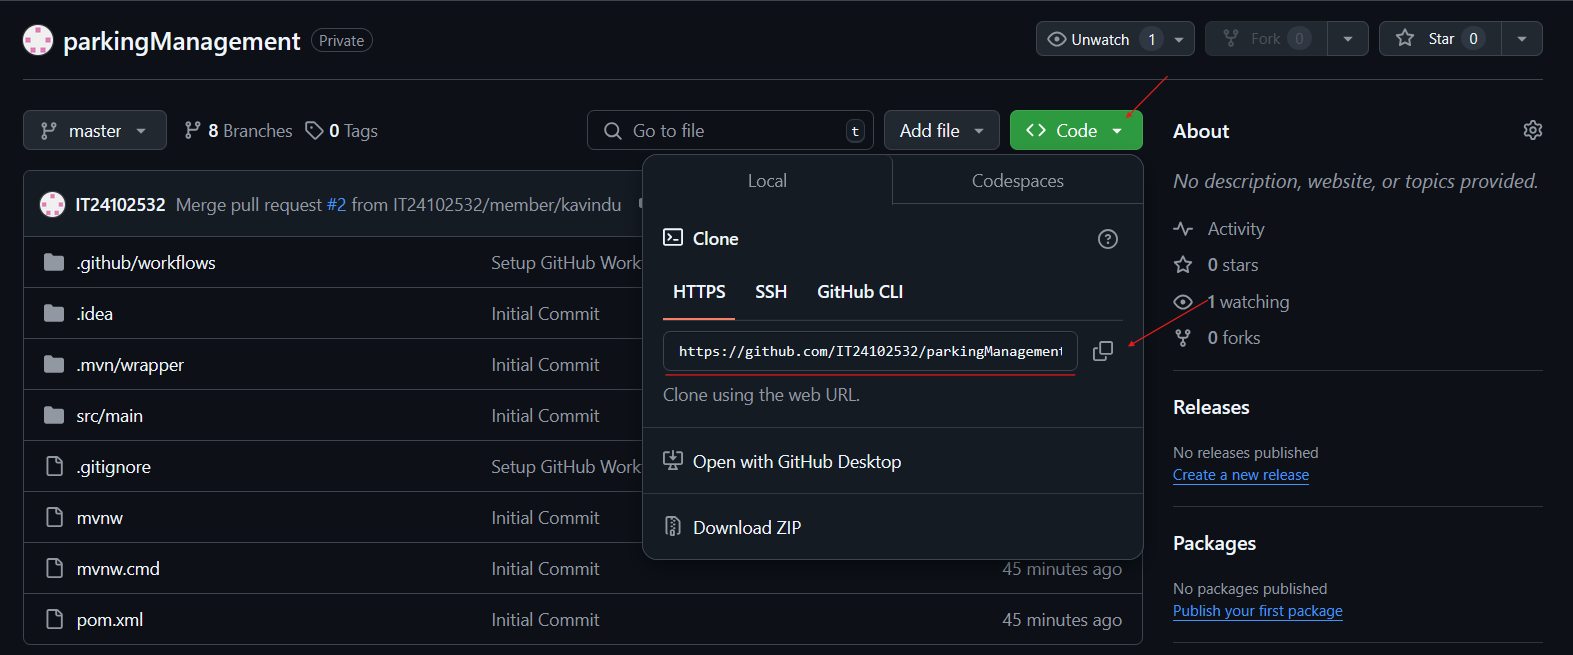
You’d see something similar. Since we haven’t linked this local repository to our Github, there is no origin. So first lets fix that. Go to your github repository and copy the link through here:
Copy that link. And then come down to the terminal again.
It should look like this:
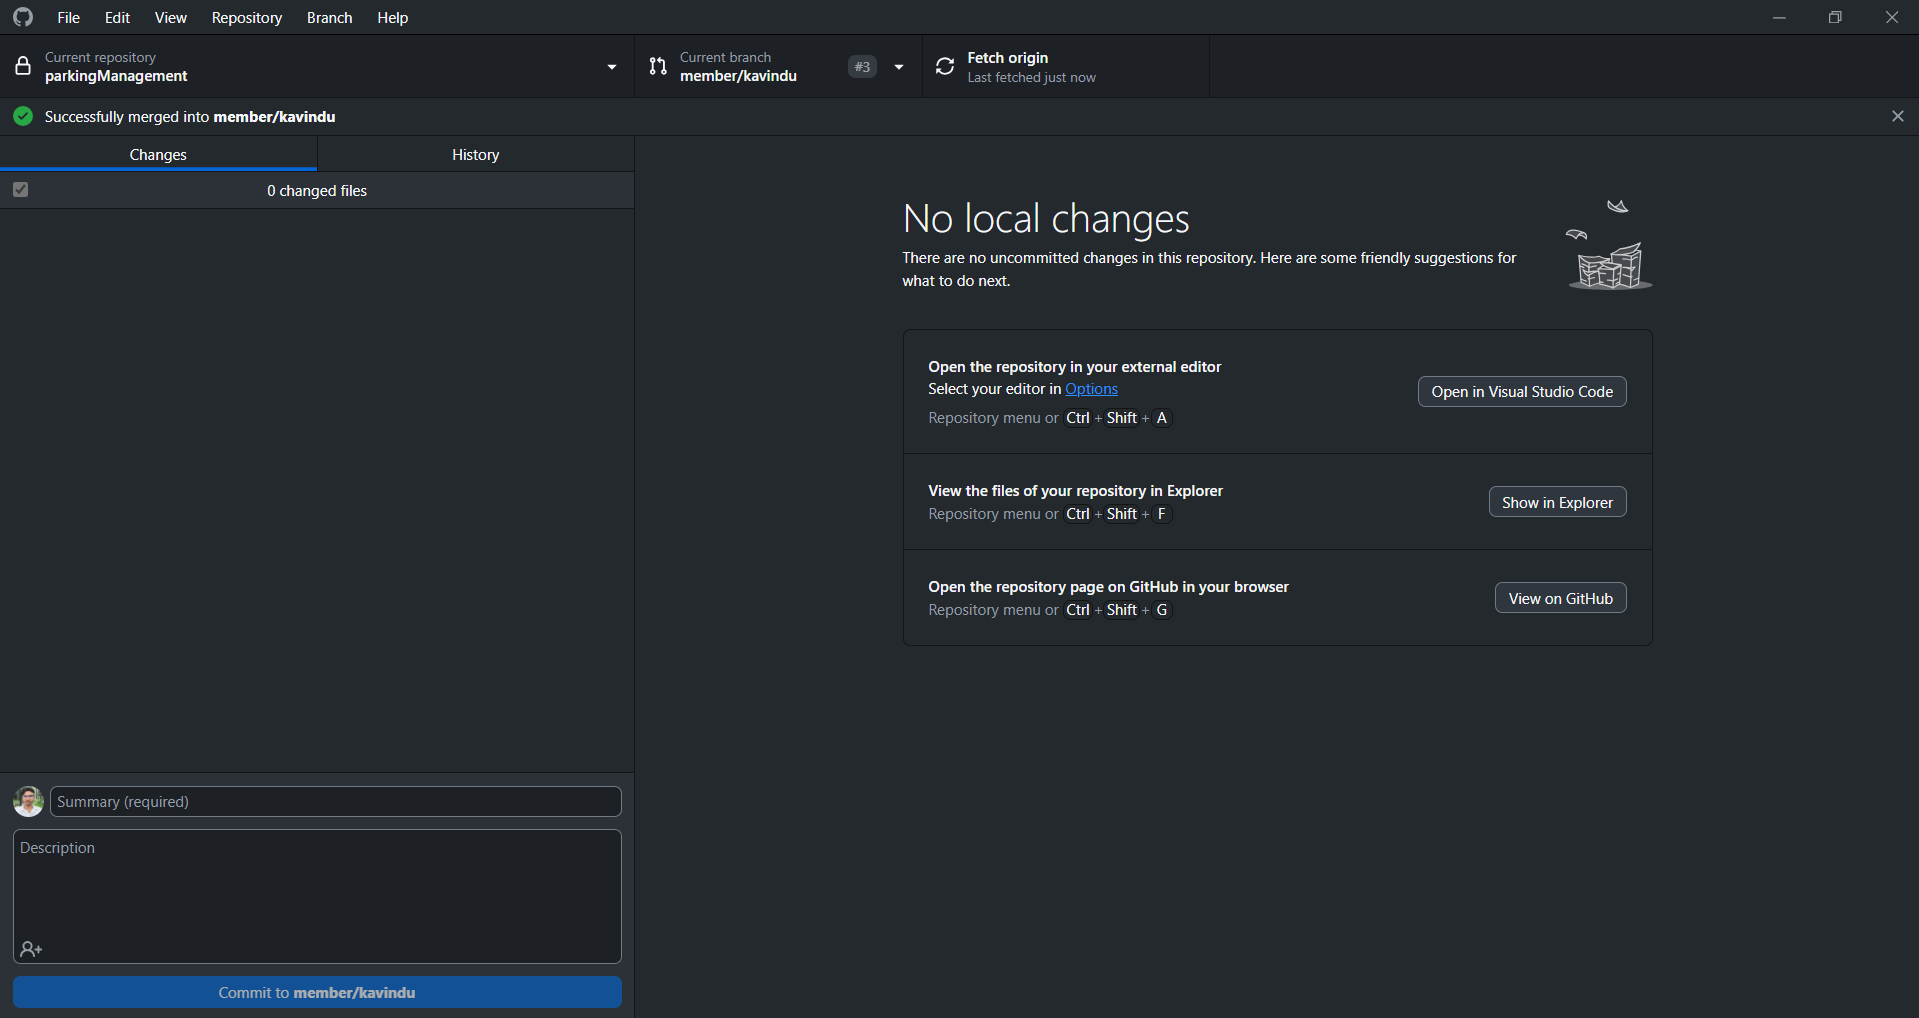
Now you’re all set to open up GitHub Desktop:
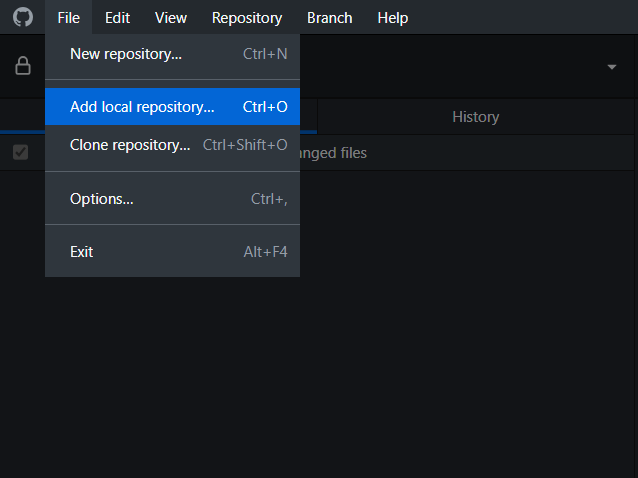
Once you opened up Github Desktop; Go to File > Add Local Repository
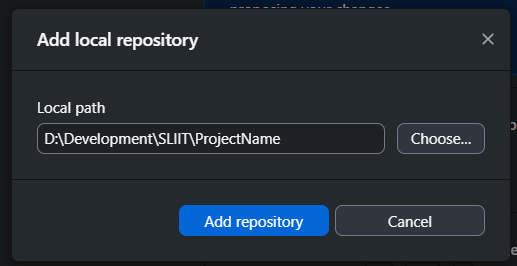
Then chose the parent directory of the project:
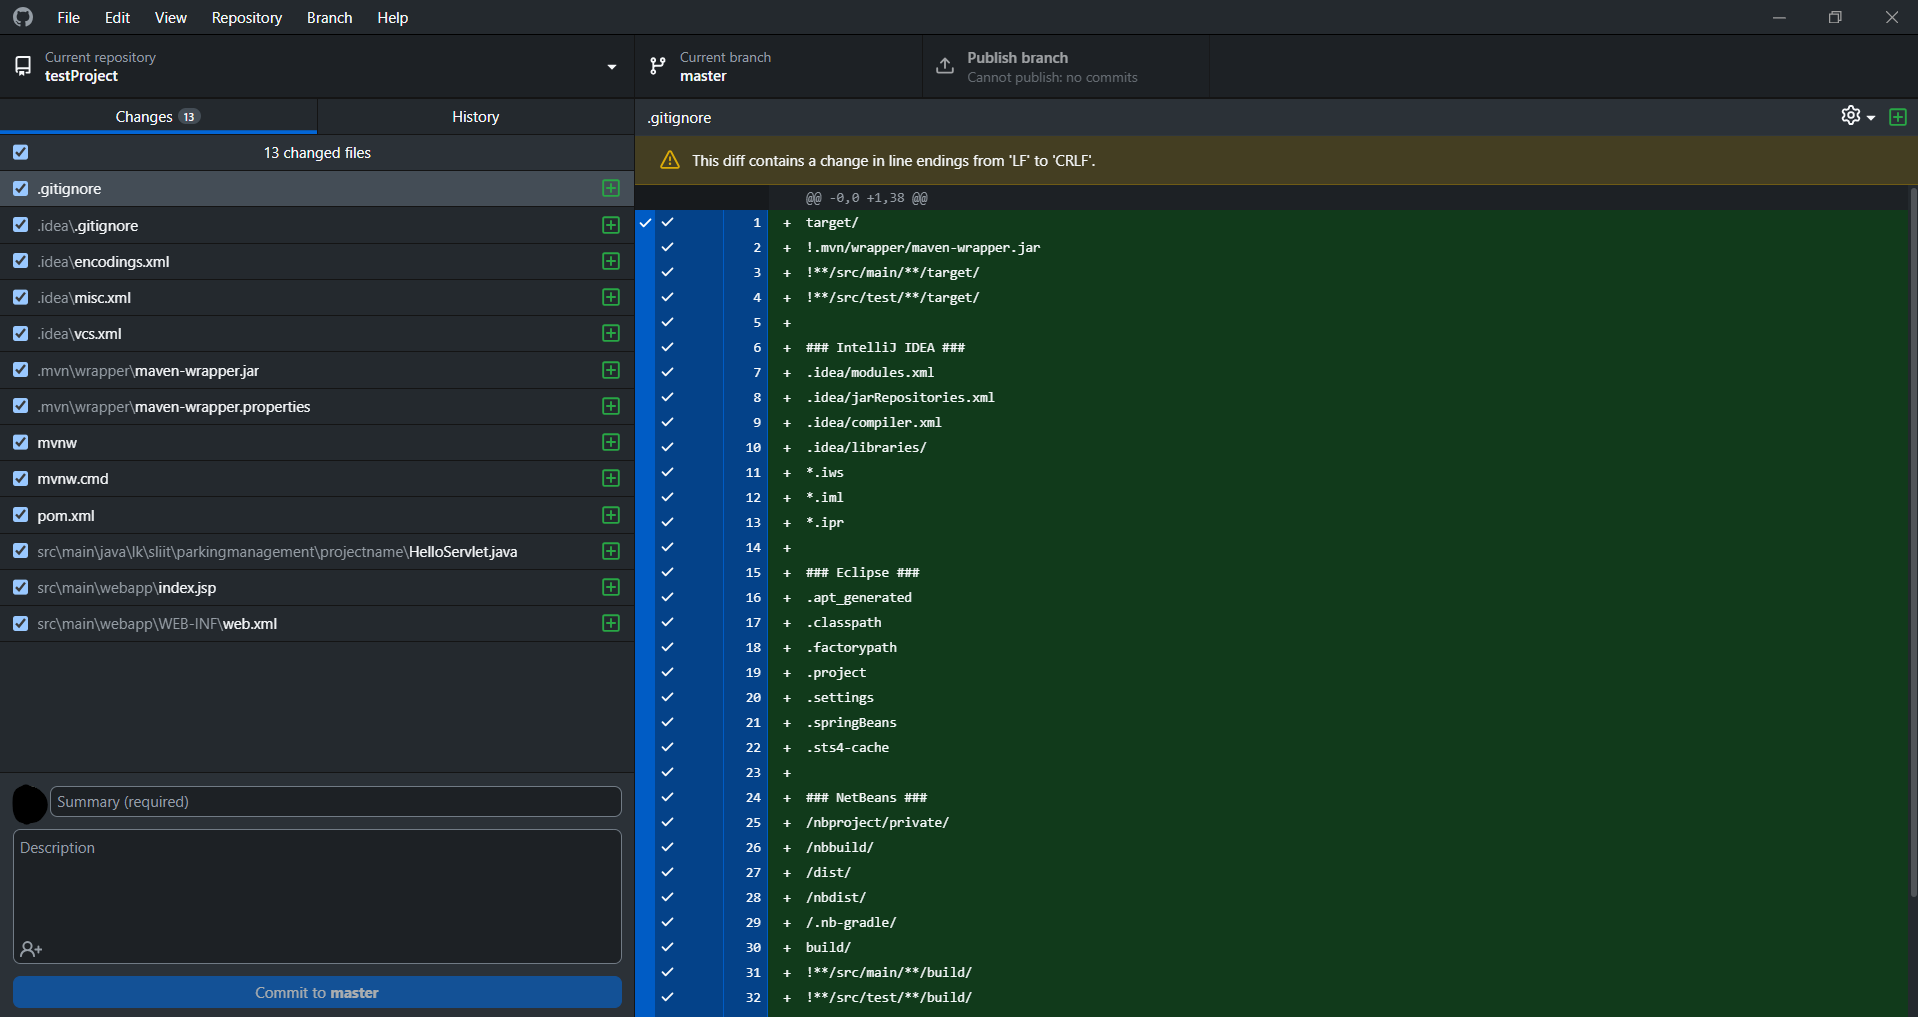
Now you will see something like this:
If you can see everything here; we’re gucci. Now all you have to do is add Initial Commit in the summary field and then click Commit to master.
Then click publish branch:
You will now see that the code is published to the remote repository:
The first step is done. From here on out are optional steps, the following steps are to establish personal branches for every member to work on the project to collaborate on a single codebase. For that we use Branches. As you can see, we are currently in the master branch.Typically, this branch is for production, this branch has the finished results. When you’re coding features, you’d be in a feature branch. We are going to create something along those lines. (to showcase that we know what we are doing, and maybe fetch a few extra marks).
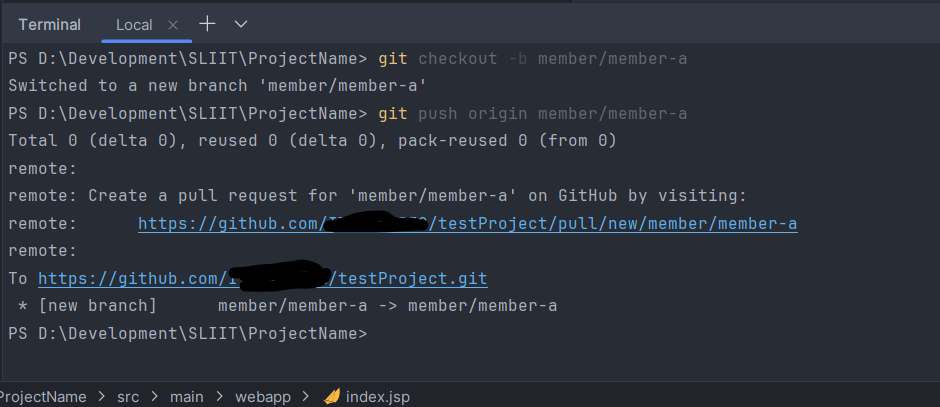
So, to create a new branch, we can use the following command.
Do this for all of your members and you’ll end up something similar like this:
When you want to switch back and forth, simply use
git checkout member/member-a
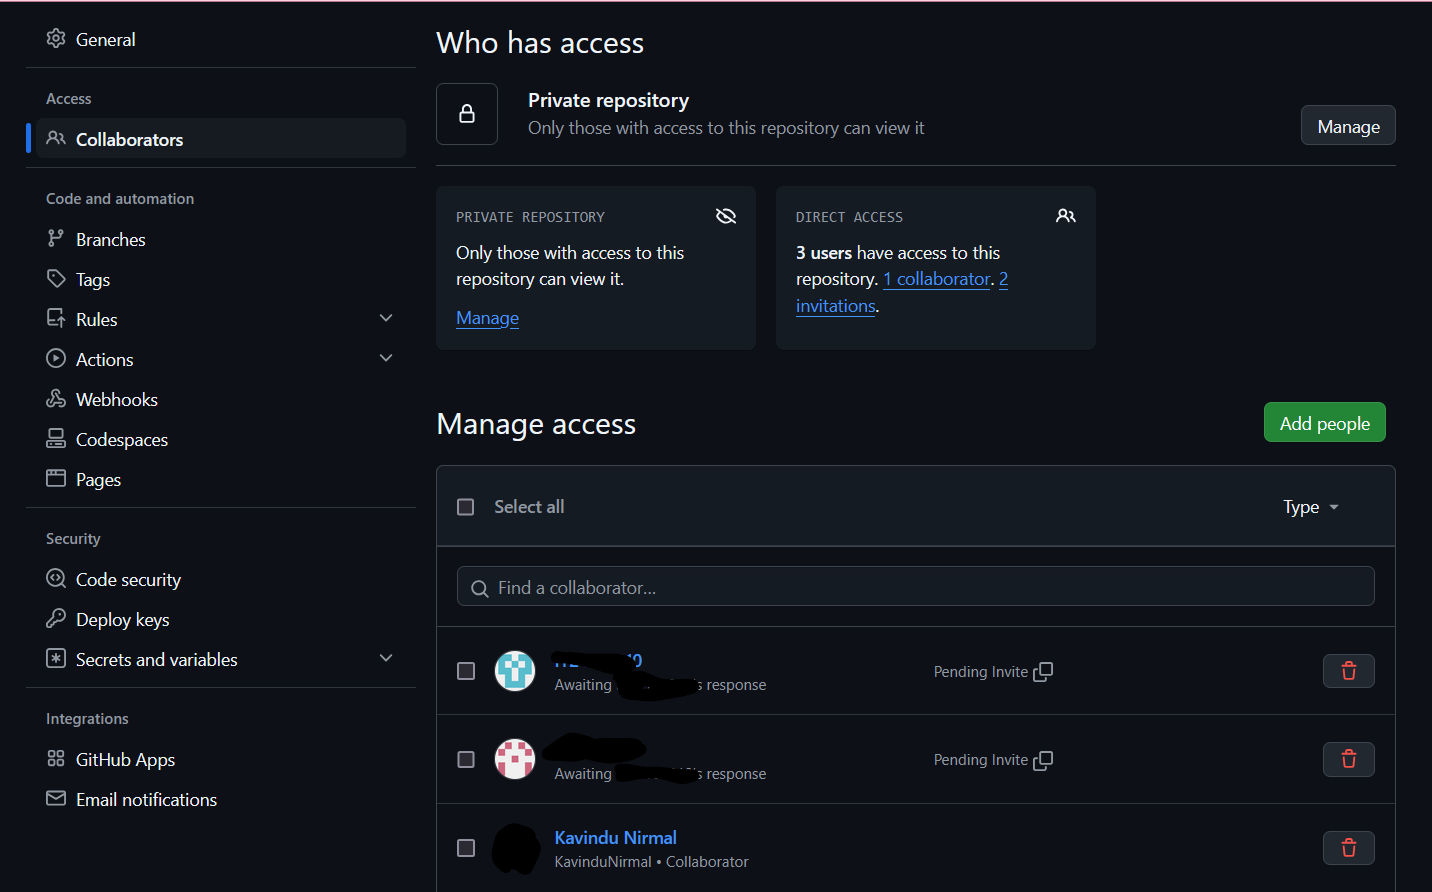
After all of this, the repository owner (The group leader) should go to Github repository, and then Settings > Collaborators > Add member. And invite your group members who are in your group.
Automating Github branches
This advanced feature is to create a github workflow to automatically sync all the changes to the member branches. If you’re unsure about this, don’t do it.
Create a folder in the root directory: RepoName/.github/workflows/sync.yml
The following guide is for my group members, and if you didn’t chose to create your own branches you can ignore most of it.
Once you have accepted the invitation. Copy the https link from the GitHub repository:
Code > Https > Copy
You can use either the terminal or Github Desktop ; For the terminal. Open the desired path for your project
example D://sliit/oop/project/
then right click and click Open In Terminal
then run the following commands:
this will download the project to a folder with your repo name. You shouldn’t rename this folder. Then. Open the folder as a project using Intellj.
Now you have the project. Here are what you shouldn’t touch:
.github/
.gitignore
.mvn
pom.xml
What you will be coding is in the main folder.
Important!
All of you will be working on your own personal branches, your commit messages are the proof that you worked on the project. So make sure you are working in your own branch.
Once you opened up your project you’ll see on the top left the active branch
Make sure you’re NOT in the main branch. You can do this by opening terminal
in the terminal type
git checkout member/<your-name>
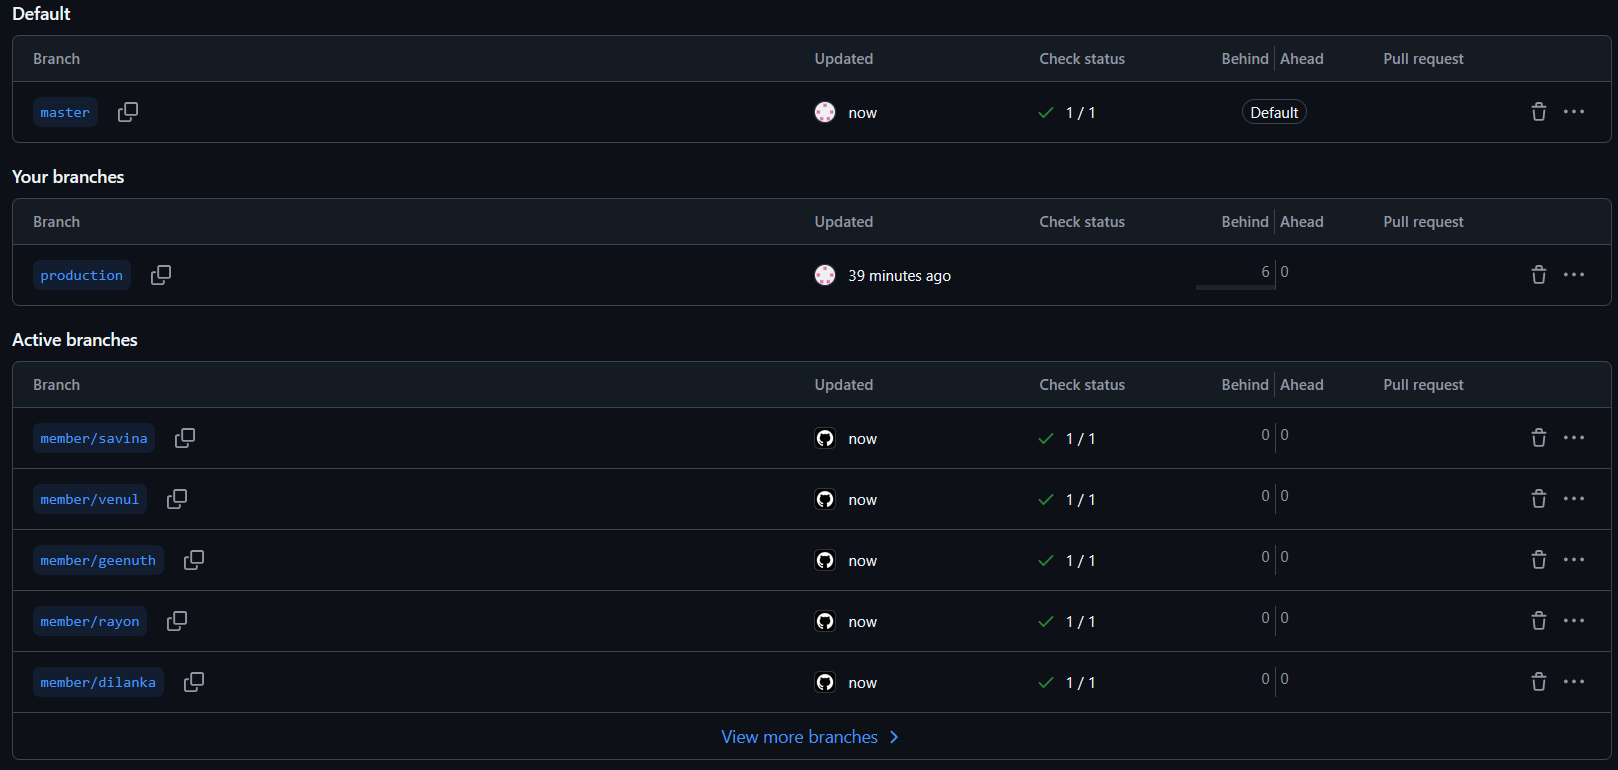
It is important that you choose the correct branch, here are the available branches
once you’re inside your branch, check it again and verify
Now you’re ready to code. Once you coded you have to commit those changes.
When to commit?
You can commit your work at
At the first initialization of your work
At the end of creating a functioning component
At the end of your working day
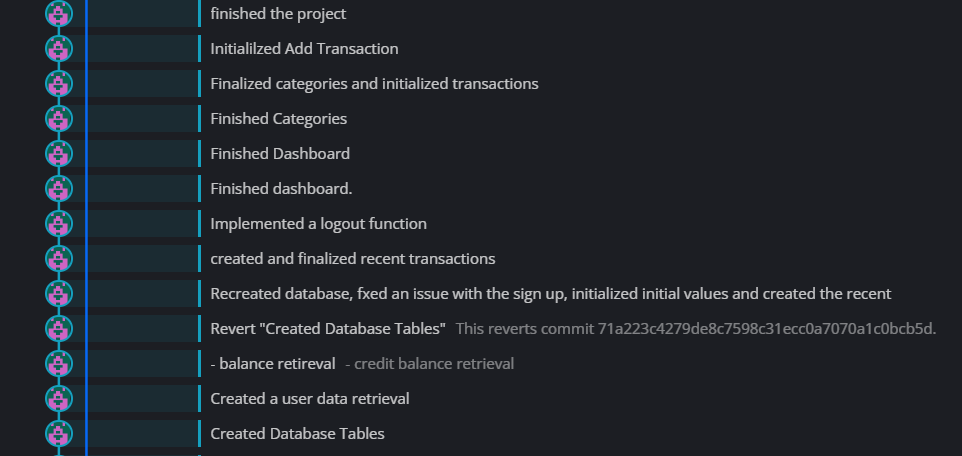
Your commit messages should look like this
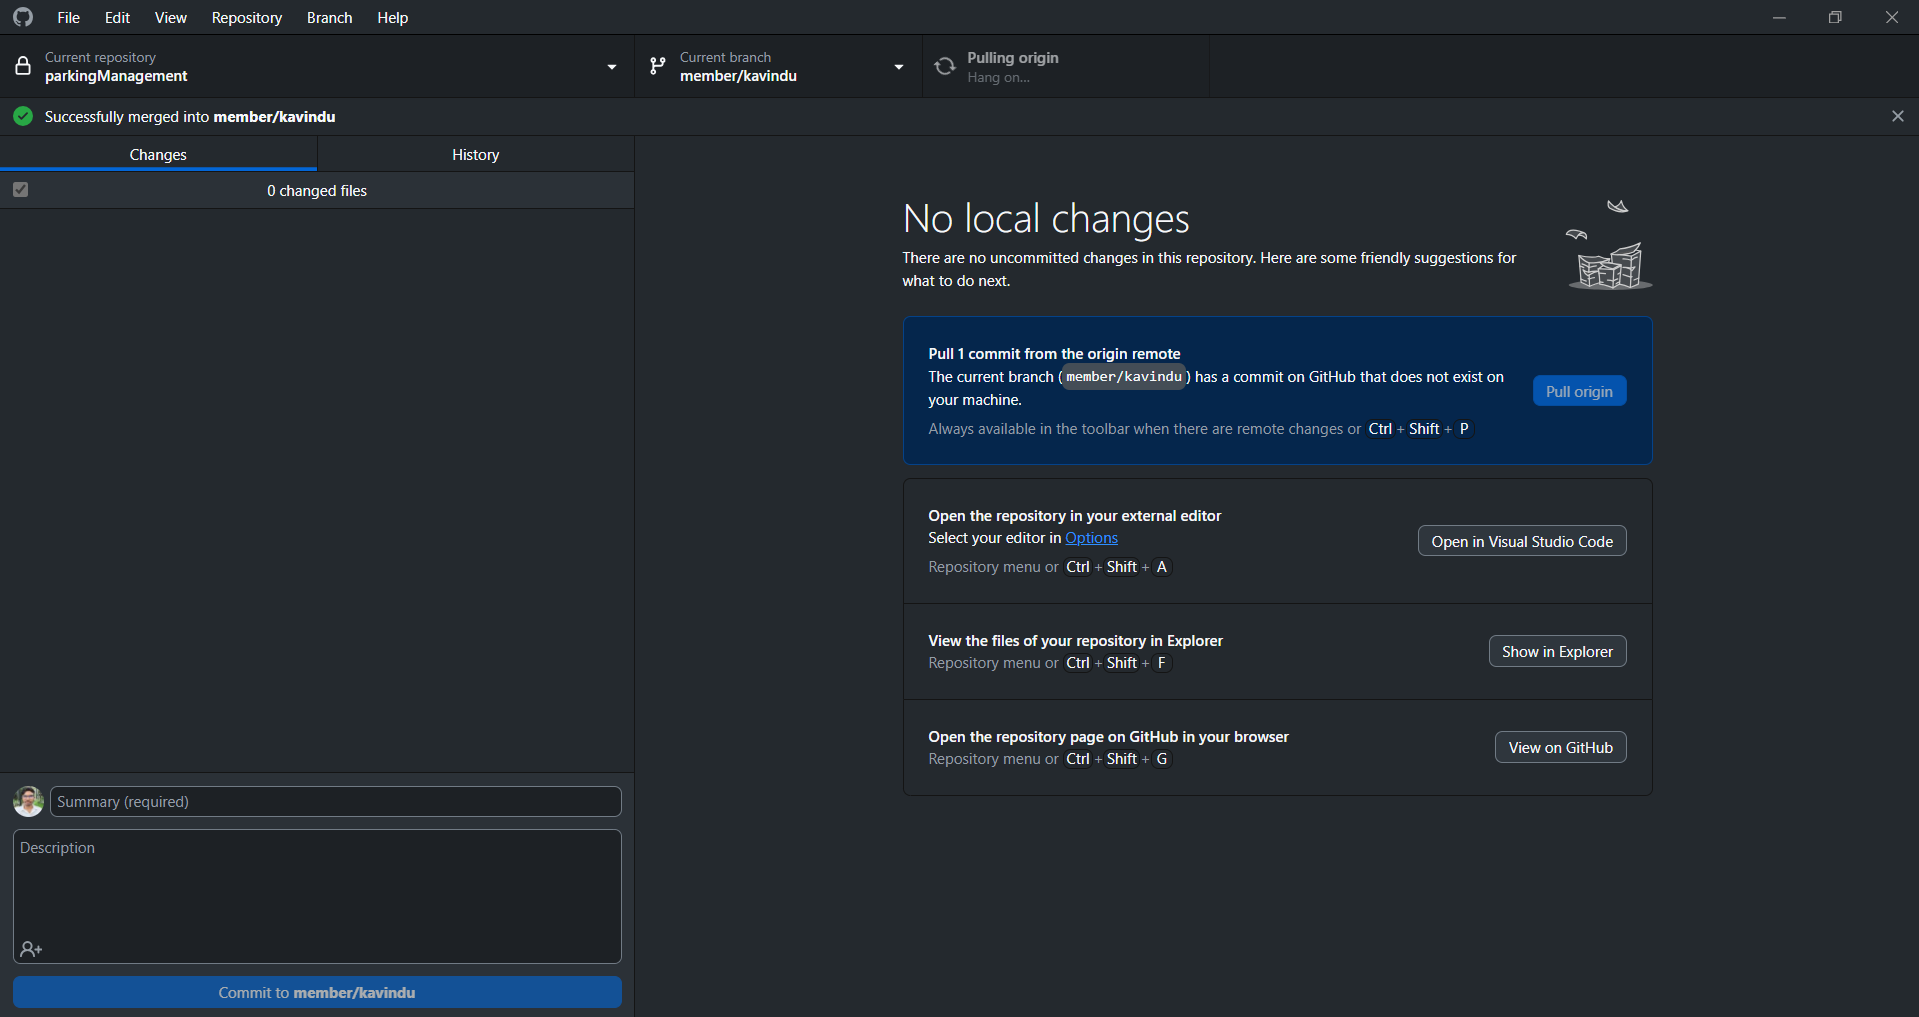
You can also commit from the GitHub Desktop.
In the changes window, it will show all the changes, just click the files you want to commit, write a commit message and then commit. Once you’re satisfied with your work or when you’re done for the day, PUSH those commits.
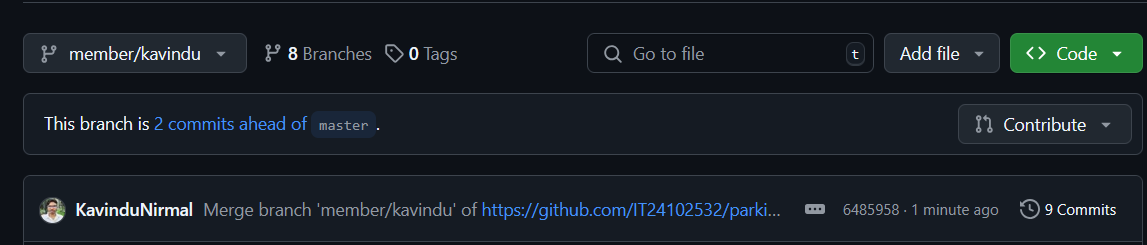
once you’re done with a feature, or a part I’ve assigned to you, and you pushed those changes to your branch. Go back to the repository, you will see something like this.
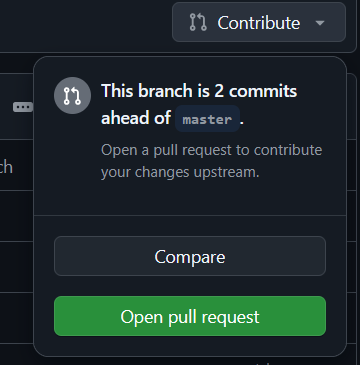
When you see something about commits ahead of master you are going to click the Contribute button. and in there > open pull request.
Add the work you’ve done so far since your last pull request and then click create pull request.
That’s all. Once you’ve merged, you can then refresh your project (sometimes it freaks out if I merged another branch in the background. So fetch your branches, after I accepted your merge request)
I highly recommend you using GitHub Desktop for this. You can do everything using a GUI
Head's up
This might be over the top for your project, if you get stuck anywhere, send me a message.
If you chose to follow this guide, you might want to put this link as a reference in your project documentation. (If you don’t know how to write a documentation, I might publish something about that in about a week or so 😉)

 If it worked it should automatically launch your default web browser with the website. Otherwise, go to http://localhost:8080/ProjectName_war_exploded/.
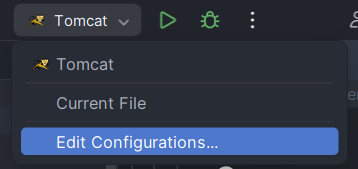
 If you have come this far: From now on, Pay attention.
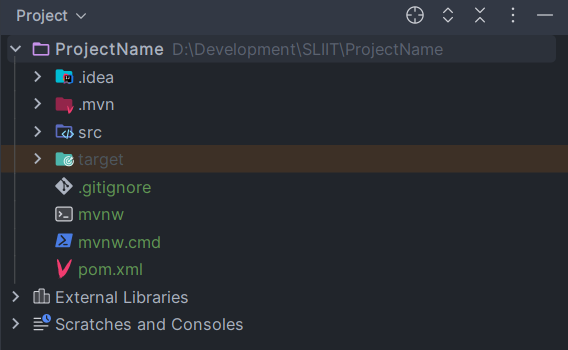 (The file names, not the icons.)
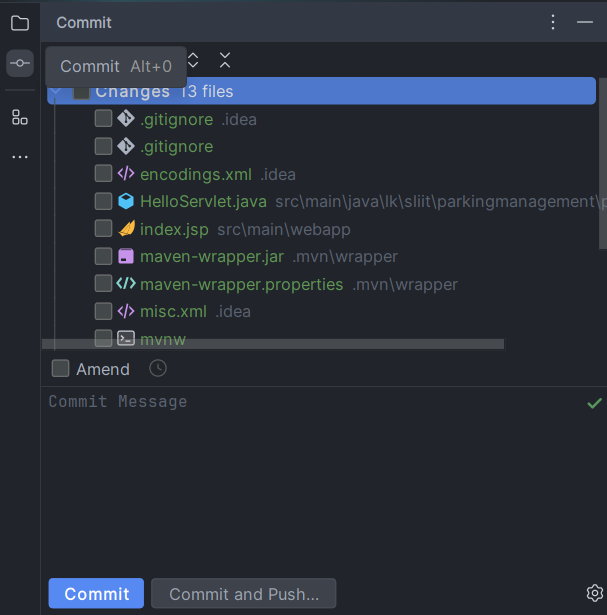 You can see all the changes you made to the files. Since this is the project initialization. All the files are green and ready to be committed. But before we do anything here open the terminal (bottom left) and type:
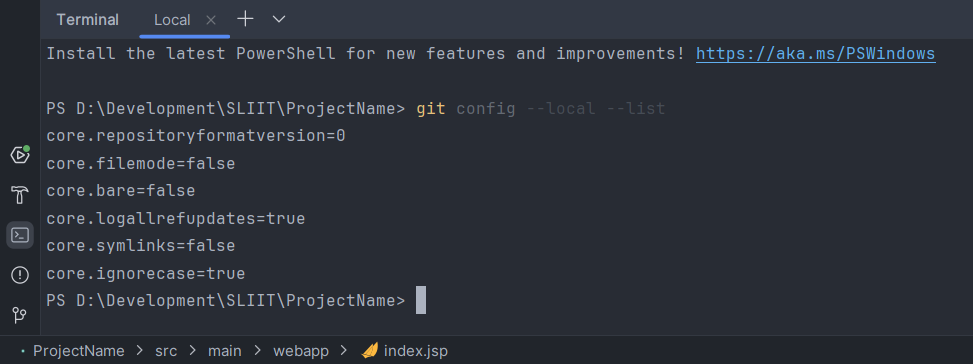
 Copy that link. And then come down to the terminal again.
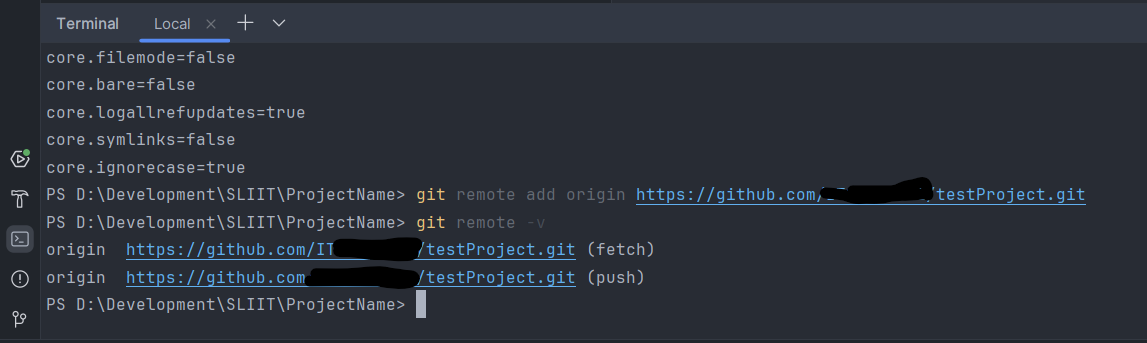 Now you’re all set to open up GitHub Desktop:
Once you opened up Github Desktop; Go to File > Add Local Repository
Now you’re all set to open up GitHub Desktop:
Once you opened up Github Desktop; Go to File > Add Local Repository

 You can use either the terminal or Github Desktop ; For the terminal. Open the desired path for your project
example
You can use either the terminal or Github Desktop ; For the terminal. Open the desired path for your project
example 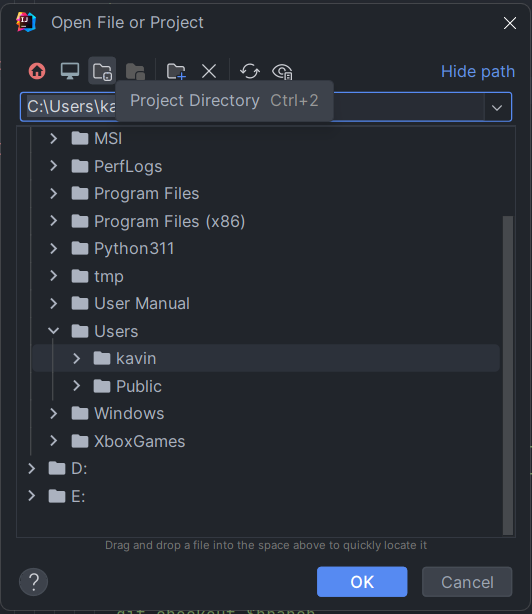

 in the terminal type